All engineers have their personal work flows, session organization schemes, and setups specific to their style. Which is fine when taking on a project where you are going to be the only engineer, but when giving DAW sessions to an outside engineer that has no knowledge of what kinds of tracks he is getting can make for a confusing time. Especially if the session is coming from an artist doing his/her recording at home.
Recording at home is a great way of cutting costs (if done correctly and with the right equipment), but come time for mixing and mastering you might want a different set of ears on your project. And that comes with a price tag. In order to keep that price tag to a minimum here are a few things that will help us outside engineers streamline that process and reduce costs for you.
1. Correct Labeling
Please label your tracks, correctly, please.
When creating a new track in your DAW, it probably appears with a generic name. Something like “Audio 1” or “Aux 1”. Please rename this track with whatever is recorded onto it.
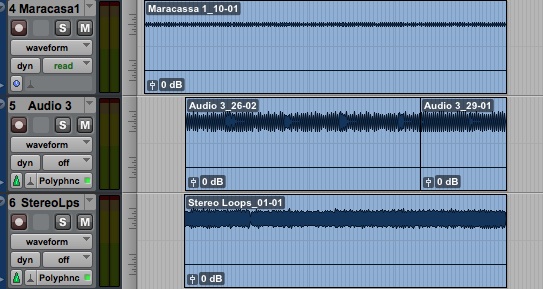
Just using the power of contextual clues, this is probably some kind of percussion track. But what is it? It also breaks another rule that I’ll discuss later (using mono or stereo tracks). Also in this project, there was a song with clips of two different singers in the same audio lane. I guess the male and female voices are getting treated the same? So if you don’t want your mix engineer spending billable time on labeling and moving around tracks, please label your tracks correctly.
2. Use the Correct Track Type
As you can see in the picture blow, there is a difference between mono and stereo tracks. Recording into a stereo track using only either the left or right input, not only clutters up your Edit Window but also creates a useless Audio File that your DAW has to keep track of.
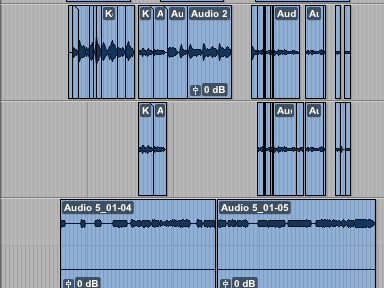
For all of these tracks, I had to “Split into Mono” and then delete the track with the blank clip in it. That took almost half the time I spent on editing BEFORE I even set up the session to mix. So, remember to trim the fat!
3. Editing
From the picture above, you can see that the client did some editing, and maybe some comping, before giving me the session. Awesome! Doing the editing and compositing the tracks before giving your engineer the session saves them time and you money. It also allows you to get the right “performance” together, making sure the song is the best it can be. However, there were no crossfades between clips, so I had to do some cleaning. Depending on your comfort level, this one may be optional. Make sure you are present when the engineer is comping your performances or have a good enough relationship in which you trust the engineer to make performance decisions (and maybe even give him some producing credits).
There you have it! A few simple tips to help you save money on your next project. If there is anything I missed or anything you have specific questions about, please fill out the form on the Contact page.